Monday, 5 November 2012
12 TAGS OF 2012 - NOVEMBER
I had all the distress inks and stains plus the strip die, but that was it really, so another compromise which I think has worked really well.
I think the squirrel has his eye on that acorn but he had better wait a while because the glossy accents aren't quite dry!!
The leaf stamp is from Tim's Falling Leaf collection, the word is a Hero Arts stamp, the chicken wire stamp is from The Artistic Stamper and the gingham stamp is from Wendy Vecchi.
Another fun project which has given me a great idea for a birthday card I have to go and make now for an elderly male neighbour. Thanks Tim.
Sunday, 23 September 2012
WICKED WEDNESDAY ATCs #50 - CIRCUS FUN
The images were a freebie I found some time ago and have been sitting in my image file just waiting for this week's challenge. I couldn't pick just one so used all 8 by making this little concertina fold, double-sided ATC. I hope these cheery little clowns bring a smile.
I have been 'beavering' away at my Grande project and apart from waiting for some special glue to arrive, I am well on with it. Sticking awkward shapes of metal in equally awkward places on glass and plastic have proved too much for my Cosmic Shimmer, Multi Matt Medium and Glossy Accents, so let's see what this other glue will do - if it ever gets here.
Today's tease then:
Hmmh!
Thursday, 2 August 2012
WW # 43 - TAKE TIME FOR YOU
I found this ATC in my stash and would you believe, I made it on 22nd March 2008!!!!
The background is alcohol inked with birds overstamped in Archival black and then covered with glossy accents. Not sure where the time piece came from but it's been cut out and then 3D foam added for depth. The words are taken from a Hero Arts Paris stamp. I remember threading a needle with the gold thread and 'sewing' the tow ropes onto the card.
Just off to spend more 'ME' time now.
Friday, 11 May 2012
ATCs/CARDS WITH ATTITUDE #13 - BUTTERFLIES AND BLOOMS
I ran an A6 sized piece of Lost and Found paper through my printer after I had re-sized the digi image to fit an ATC. I then cut the paper to it's final size before colouring over it all with a few different distress stains. The red and green colouring were done with studio acrylic paint and the white of the mug was achieved with picket fence distress stain. A covering of glossy accents on the hearts and a Prima leaf finished it all off.
Pop over to our blog HERE for some fabulous samples from our Design Team, some of which have only joined us this week. They have done so well. Remember, you can make a card if you don't like ATCs and if the theme of this fortnight's challenge doesn't appeal either, just make something with an anything goes theme.
Saturday, 3 March 2012
WICKED WEDNESDAY ATCs # 21 - CELEBRATE ART
I coloured the canvas with distress stains before stamping over it with the Mona Lisa stamp. The little portion under the fragment was coloured with distress markers before sticking the fragment down with glossy accents. The letters are grungeboard painted with a black dabber and edged in gold.
I hope that one of the most famous paintings in the world is a suitable subject this week.
Saturday, 11 February 2012
WICKED WEDNESDAY ATCS #18 - LOVE/HEARTS OR VALENTINES DAY
I thought I would use some of my stash for this one, so out came my grungeboard sheets. I started by using picket fence distress stain over a swirl stamp which I stamped on a cream base card. Over this, once dry, I blended victorian velvet, aged mahogony DIs and blended the edge with walnut stain. (Thanks Hels for today's tutorial and the reminder of this fab technique). I used gold dabber on the letters and edged those with walnut stain also. The heart is coloured with fired brick distress stain and the key with walnut stain distress stain. I stuck everything down with glossy accents including the red rose.
A simple card but I enjoyed making it and got my fingers covered in ink........well, that's all part of the fun eh?
GRUNGY MONDAY #35 - A HOLTZIAN ATC
Here is my card:
I used a grungeboard butterfly,
vintage photo and aged mahogony distress inks
blending tools and foam pads,
paper from some of Tim's Idea-ology range
glossy accents.
Saturday, 26 November 2011
WICKED WEDNESDAY ATC #7 - BOOKS/READING
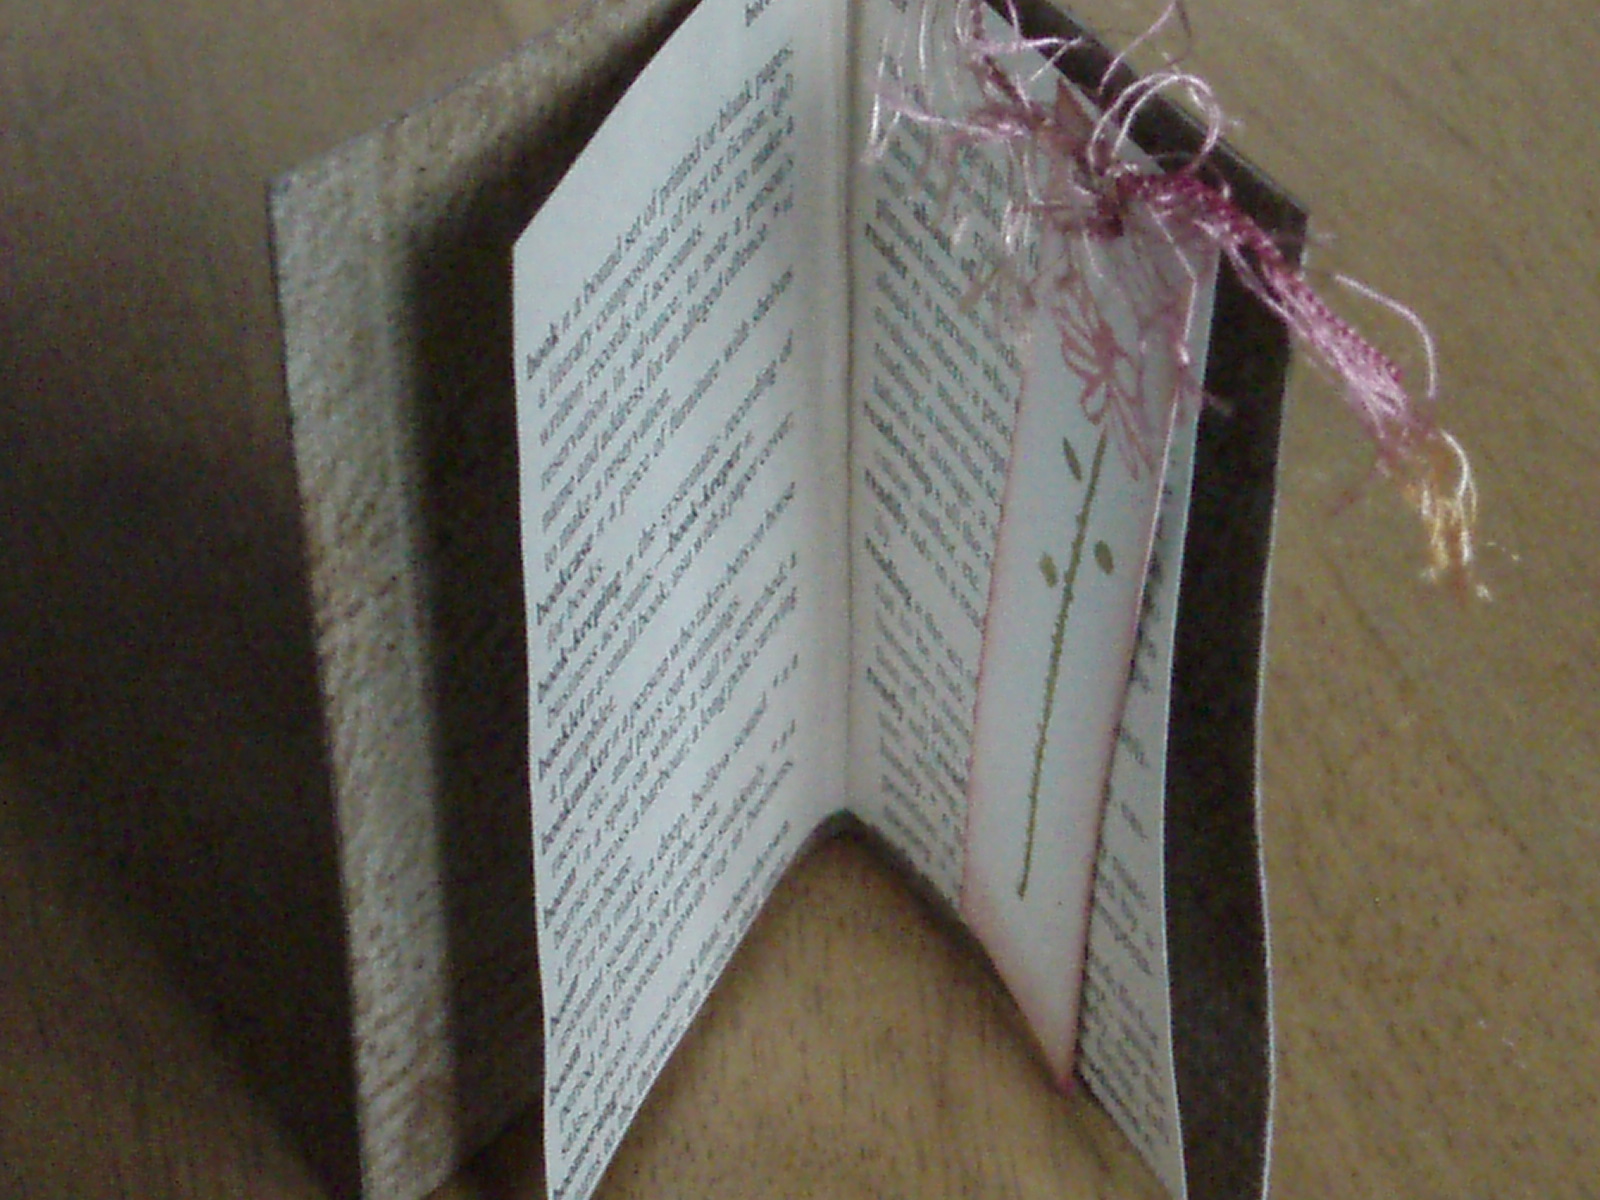
Interpret this however you want by using stamps, digis, or even torn printed pages. I decided to make a little book. It proved difficult to photograph in one go, but here it is:
I used grungepaper and put it through my Big Shot in one of Tim's embossing folders - collage - in order to give it a faux leather look. I then used Old Paper distress stain all over it followed by Vintage Photo distress ink. I stuck some dark brown ribbon along the spine, a gold peel-off in each corner and used lettraset letters on the front to call the book Wicked Atcs.
I found the words Book and Reading in an old dictionary, cut them out and made a couple of pages to fit the inside. I stuck these in with glossy accents.
Then I cut a small piece of white card, stamped it with a Hero Arts flower which I coloured with Peeled Paint and Worn Lipstick distress ink to stamp, distressed the edges with Barn Door DI and added a bit of fibre to match. Voila, a bookmark.
Just a bit of fun. But, that's what it's all about isn't it.
Monday, 23 May 2011
ATC CHALLENGES BLOG #2
I've had a go using some of my precious Brixham shells.
I used a couple of image downloads this time. The sea has been painted over with a mix of multi matt medium thinned with perfect pearl mist. I spread some glossy accents and black diamond stickles over the lower rocks and stuck the shells into it. A sprinkle of coarse gold glitter added extra sparkle.
The plane is a brass charm coloured with souffle Sakura pens and the little sign is a bit of fun.
I'll just pop over to their blog now and enter it.
Do have a look if you get chance as there is a little prize on offer.
Tuesday, 16 November 2010
CHRISTMAS ATCs
I thought I should make a few Christmas ATCs to swap when I see any of the girls, especially as my stock has virtually disappeared.
I noticed on Tim's blog that he had made a tag which looked 'scrunched' and distressed. However, on closer view it was checkered. No idea how he had done it unless it was a texture fade embossing folder. Anyway, I folded some card kind of concertina-like both ways, then using frayed burlap, I distressed over it. It kind of worked. I stamped the trees in archival black, quite lightly, then painted over them with forest moss and pine needles. The forest moss ones then had a coat of glossy accents. I 'flicked' pearl mixatives over the whole thing, added a reindeer charm, some cord and edged the card - after sticking it to mount board - with walnut stain.
This was fun. I had a Santa image from my free download folder, which I cut round so I only had his face and shoulders. I had kept all the little bits of Tim's paper from his retro grunge stack after having cut out loads of small flowers. I simply stuck bits all over some mount board using matt medium. The swirl piece in the middle is a 1" square from the stack. I stuck Santa in the middle and also the torn dictionary Santa Claus definition. I then used distress embossing ink all round the edges and sprinkled it with cinnamon powder. Boy does that smell good when you heat it. Some rock candy stickles on the words and some Xmas stickles on Santa's hat finished it off.
This one was inspired by the stamp that I found in my 'scrap' drawer. I used my quickie glue pen to draw lines on some heatable acetate before sprinkling black embossing powder on and heating it up to form the basis of my stained glass. I left all the little bits of powder instead of brushing them off. I then used Sakura pens to colour each area on the reverse. Once dry, which was after the first episode of Corrie and before the second!!!!!!!!!! I stuck it to some mount board using a small amount of glossy accents around the edge. Some black stickles round the edge of the top covered where the glossy accents had taken the Sakura off. Then I simply stuck the stamp on - job done. Not sure when I shall get the chance to make any more as this and next week are chaotic.
Saturday, 9 October 2010
PURPLE AND GREEN
As I haven't started any Christmas cards yet!!! I thought this may be an opportunity to make the first one.
The image is one I coloured whilst away recently using Copics. I used the snowflake punch from Martha Stewart down one side, then cut around the rest. The base card is 6"x6" white hammered card stock topped by a purple coloured Bazill card.
I cut 2 strips of patterned paper - the green is by Creative Imaginations and the lighter purple is from some papers given to me. The purple snowflake was saved from a previous Xmas card coloured with V09 Copic and stuck down with glossy accents together with the strips of lilac beading. The green swirls are from the same stock as the green paper. I stamped the words using peeled paint DI and matted it onto matching lilac paper before using 3D foam to add depth. Finally, I 'splodged' a lot of glossy accents in the bottom corner and added seed and bugle beads.
I struggled a bit to get going with this card, but after having trapped my mojo, finally succeeded.
Thursday, 27 May 2010
TWEET TWEET
Check out these challenge blogs:
Hidden Treasures - http://hiddentreasureschallenge.blogspot.com
Sunday Stampers - http://pinkleart.blogspot.com
both are Sunday challenges. Hidden Treasures #1 is pink and brown, whilst
Sunday Stampers #104 is tear something.
This little card satisfies both. I used distress inks for the background in the colours, victorian velvet, spun sugar, antique linen and brushed corduroy. A few splashes of water gave the mottled effect. The torn paper is from my stash and I edged it with victorian velvet ink. The cheeky little bird was a new aquisition and is a set of stamps by Lindsay Mason. I tried her technique of stamping on acetate, covering part of the image, this time the bird's body, with glossy accents, adding a few drops of alcohol ink - I used 3 pinks and a bit of brown - before adding some glitter and scrunched up tissue paper. Once dry I cut out the body and added it to another which I had stamped onto card. I roughed the edges and distressed them with brushed corduroy. The little words are simply stamped onto a bit of card and again distressed with the pink and brown. Instead of using sticky gems in the corners, I added 3 drops of stickles, one set in pink and the other in cinnamon.
A simple little card but quite effective.
Wednesday, 10 February 2010
DANCING ON ICE
Monday, 14 December 2009
ATC CATCHUP
The first 5 are from Hazel (Dido's Designs). I love the subtle colours of '2 little girls' and 'sparkle flutterby'. A bit of distress inking there me thinks. The sparkle continued onto 'batty' the Halloween card which made me laugh. 'Sweet Christmas' has a couple of sweetie brads on it which look like my hubbie's favourite sweets. Better keep this one away from him! 'Fairy Aurora' has a beautiful washed background. The little angel has sparkly wings and I just adore the wish rub on in the top corner. Lovely cards which will go on my Flickr then into my collection. Thanks Hazel.
These 4 beauties are from Sharon. I so laughed when I saw the 'Halloween' card. This would have been a good entry into Heather's Halloween swap. 'Gingerbread Friends' looks almost good enough to eat and every so often you can see tiny, tiny stars on the background. I like the inked edges on this one. 'Christmas Post' is a little stamped image that Sharon has coloured then highlighted with glaze. The shiney background sets this card off. It's really quite lovely. The final one in this batch is 'Time Flies'. The background is a stamped image with parts, ie. the clock and eyes, brought to life with glossy accents. I think I see some stickles on the bow and other clocks which help bring the whole thing to life. Thanks to you Sharon.
And now, here are my Angel swaps from Heather, plus an ATC that she made and sent me for Christmas.
As you can see, I received Heather's angel ATC which I am over the moon with. It's absolutely gorgeous. My ornament is the fantastic wooden bag that Sheila made. How lucky am I then.
I shall put all these photos on my Flickr. Please pop on there for a nosey.