This weeks challenge over at the Stampotique Designers Challenge blog is - ATCs.
I thought I would have a go at this one, so here is my card:
2 sticks have been framed - again!
I sprayed some Adirondak inks onto some pre-wetted cardstock and then sprayed water through a stencil over the top of the ink. A bit of dabbing and drying made the base. I then simply used a Copic multi liner pen to draw the frame and coloured every other section with butterscotch acrylic dabber. I stamped 2 sticks with Archival black and again onto some card. They were coloured with Copic caios and the bodies 3D foamed onto the stamped images. I then used studio g stamps for the words which I cut out after colouring them with mustard seed DI. They were stuck down with glossy accents.
I love 2 sticks, they are amongst my favourite Stampotique stamps - which are all of them!!!!
Showing posts with label paint dabbers. Show all posts
Thursday, 26 April 2012
Tuesday, 8 November 2011
ATC CHALLENGES #14 - MERMAIDS
The new challenge over at the ATC Challenges blog is either anything goes or specifically - Mermaids.
I decided to have a go at this one and chose the challenge version.
The photo could be better, but the light today has been awful to craft by let alone take photos. Hope you can see my effort though:
I decided to use a free download and add embellishments. The 'shell' is a metal piece which I painted with lemonade dabber and then embossed with scattered straw distress embossing powder. It was to resemble being covered with sand. I then used my precious Brixham shells, some pearls, stickles and punched autumn branches for bits of seaweed. I then misted the whole card with perfect pearls to make it glisten.
I decided to have a go at this one and chose the challenge version.
The photo could be better, but the light today has been awful to craft by let alone take photos. Hope you can see my effort though:
I decided to use a free download and add embellishments. The 'shell' is a metal piece which I painted with lemonade dabber and then embossed with scattered straw distress embossing powder. It was to resemble being covered with sand. I then used my precious Brixham shells, some pearls, stickles and punched autumn branches for bits of seaweed. I then misted the whole card with perfect pearls to make it glisten.
Friday, 28 October 2011
WICKED WEDNESDAY ATC CHALLENGE - SET OF 3
The challenge this week over at Wicked Wednesday ATC challenge is to make 3 ATCs which have a theme running through them. They can be the same design with different colours, tell a story, or whatever comes to your mind so long as they are linked somehow.
This is only their third challenge but already the blog is becoming very popular. I love it because it keeps the old grey matter alive!!!!
Any way, here is my effort:
I wanted to tell a story but couldn't get my thoughts into gear so ended up making 3 cards using The Beast from the Octopode Factory. There are only 4 colours throughout plus black around the edges, these were all paint dabbers except for ripe persimmon DI which I used to highlight the embossing.
Another smashing day especially as I spent it all in my little craft room - a rare thing nowadays.
This is only their third challenge but already the blog is becoming very popular. I love it because it keeps the old grey matter alive!!!!
Any way, here is my effort:
I wanted to tell a story but couldn't get my thoughts into gear so ended up making 3 cards using The Beast from the Octopode Factory. There are only 4 colours throughout plus black around the edges, these were all paint dabbers except for ripe persimmon DI which I used to highlight the embossing.
Another smashing day especially as I spent it all in my little craft room - a rare thing nowadays.
Monday, 2 May 2011
A W.I.P.
Well I think it's in progress but I hoped it was finished, however, looking at it, I think it's lacking 'something'.
May find some words to add a bit of depth, we'll see.
Anyway, not much crafting going on here because 'peg leg' and I have been extremely busy all week putting up new fascia boards, power washing the paths, etc. etc. We are having the outside walls coated with an insulation render starting tomorrow, so this little tag just 'happened' in a few spare moments the other day.
I wanted to use the Studio paints I have and make something really bright for a change.
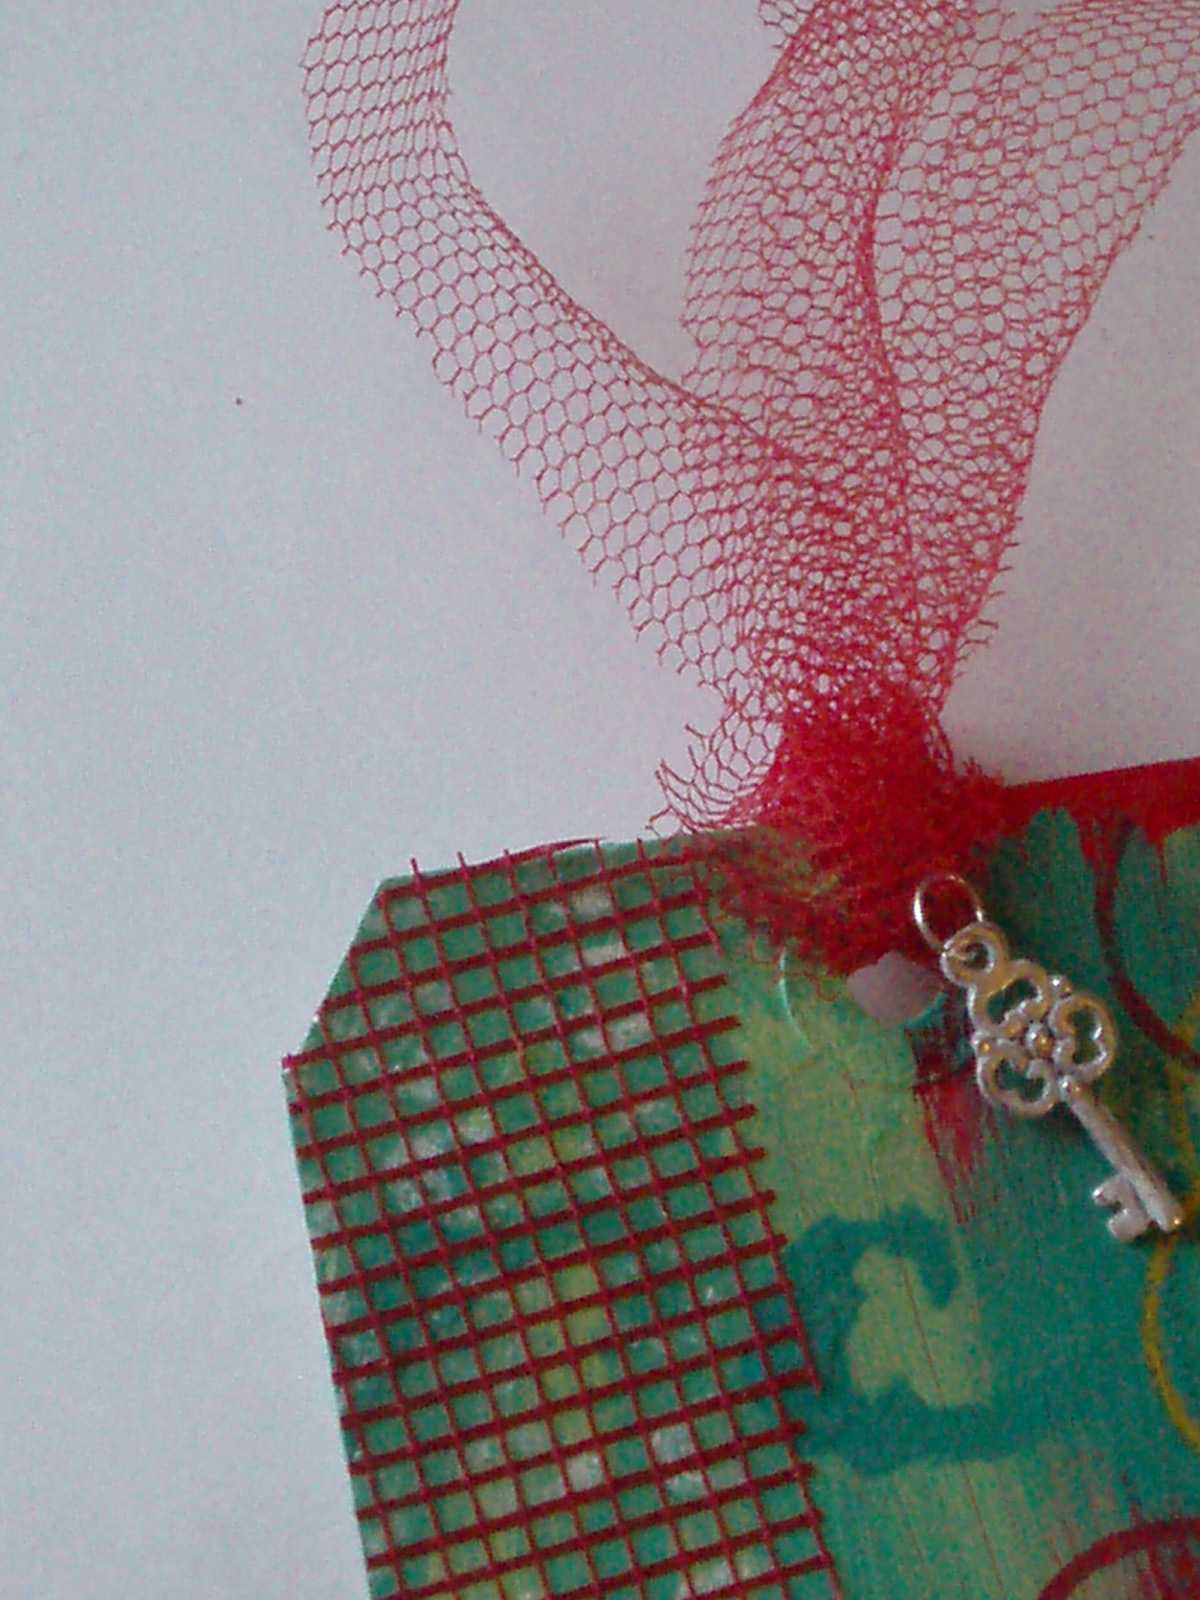
The houses are by Claudine Hellmuth. I used a white dabber on the sponge stamps and over-stamped the clear version using barn door distress ink. However, the base of the tag was the most fun. I used 3 colours of Studio paint, dash of red, yellow pastel and classic teal and mixed them around before painting the tag all over. I had some grungepaper on my shelf that I had die cut some swirls from, so I used that as a stencil together with the teal paint. The little circles are made using the top of paint dabbers.
I really like these paints and hope to gradually have them all so I can make bright backgrounds. Also, I downloaded the mixing chart which gives examples of how to make 51 colours with just the 15 pots.
I found some red voile, some red sticky netting and some white bobble ribbon plus a little key charm which I painted with white dabber, to finish off.
However, as mentioned at the start, I'm not sure it's finished and may just be a Work In Progress.
May find some words to add a bit of depth, we'll see.
Anyway, not much crafting going on here because 'peg leg' and I have been extremely busy all week putting up new fascia boards, power washing the paths, etc. etc. We are having the outside walls coated with an insulation render starting tomorrow, so this little tag just 'happened' in a few spare moments the other day.
I wanted to use the Studio paints I have and make something really bright for a change.
The houses are by Claudine Hellmuth. I used a white dabber on the sponge stamps and over-stamped the clear version using barn door distress ink. However, the base of the tag was the most fun. I used 3 colours of Studio paint, dash of red, yellow pastel and classic teal and mixed them around before painting the tag all over. I had some grungepaper on my shelf that I had die cut some swirls from, so I used that as a stencil together with the teal paint. The little circles are made using the top of paint dabbers.
I really like these paints and hope to gradually have them all so I can make bright backgrounds. Also, I downloaded the mixing chart which gives examples of how to make 51 colours with just the 15 pots.
I found some red voile, some red sticky netting and some white bobble ribbon plus a little key charm which I painted with white dabber, to finish off.
However, as mentioned at the start, I'm not sure it's finished and may just be a Work In Progress.
Sunday, 5 December 2010
TIM'S 12 TAGS OF CHRISTMAS 2010 - #5
After popping over to Church, nr Accrington this morning, to see the lovely Lindsay and her handsome prince, David, I came home to a flooded garden. The outside tap had obviously frozen last night, and when it thawed a bit, the connection pipe had blown off hence the flood. Dreading my water bill now!
I also met up with Sheila who was partaking in Lindsay's workshops, and we had a bit of a natter and she gave me a gorgeous tag and pressie, which I shall share with you tomorrow.
On to Tim's tag. Not a bad one today. I didn't have all the bits so some compromising had to be done. I like the end result and had a ball.
I used grungeboard numbers but managed the same technique as Tim described. My only problem today is a long standing one for me - I can't wipe ink off paint dabbers. Never been successful and wasn't today either, so instead of a white border around the tag, I have a pink one!! We did a bit of skidding on the way to Dawn's today, so please be very, very careful if you are driving any time soon. x
I also met up with Sheila who was partaking in Lindsay's workshops, and we had a bit of a natter and she gave me a gorgeous tag and pressie, which I shall share with you tomorrow.
On to Tim's tag. Not a bad one today. I didn't have all the bits so some compromising had to be done. I like the end result and had a ball.
I used grungeboard numbers but managed the same technique as Tim described. My only problem today is a long standing one for me - I can't wipe ink off paint dabbers. Never been successful and wasn't today either, so instead of a white border around the tag, I have a pink one!! We did a bit of skidding on the way to Dawn's today, so please be very, very careful if you are driving any time soon. x
Saturday, 6 November 2010
SCD NOVEMBER CHALLENGE WEEK 1 - HOUSES
Pop over to the Something Completely Different challenge blog for details of this weeks challenge.
The theme is houses.
A good chance to use my new Tim Holtz on the edge townscape die. I tried it with mount board but it didn't cut through properly. The die is quite intricate, just like the scrollwork one, and that doesn't really like mount board either - but I make it have it!!!
In the end I cut the houses out of grunge paper.
This photo shows the sparkle in the stickles.
This one shows the reflection of light in the windows of the houses.
I used paint dabbers to colour each house and gesso for snow on the rooves and the 'ground' plus some glitter. I already had some off cuts of mirri card that I had previously coloured with Stazon, so used little pieces to stick behind the houses. The light shines on them and makes it look like lights are on in each one.
The base card is distressed over a clear embossed Santa which I ironed to get rid of the embossing. The stars are embossed with sparkly white powder and the 'ho, ho, ho' is simply stamped with Brilliance white.
It didn't turn out as effectively as I wanted, but in real life, it's not too bad.
The theme is houses.
A good chance to use my new Tim Holtz on the edge townscape die. I tried it with mount board but it didn't cut through properly. The die is quite intricate, just like the scrollwork one, and that doesn't really like mount board either - but I make it have it!!!
In the end I cut the houses out of grunge paper.
This photo shows the sparkle in the stickles.
This one shows the reflection of light in the windows of the houses.
I used paint dabbers to colour each house and gesso for snow on the rooves and the 'ground' plus some glitter. I already had some off cuts of mirri card that I had previously coloured with Stazon, so used little pieces to stick behind the houses. The light shines on them and makes it look like lights are on in each one.
The base card is distressed over a clear embossed Santa which I ironed to get rid of the embossing. The stars are embossed with sparkly white powder and the 'ho, ho, ho' is simply stamped with Brilliance white.
It didn't turn out as effectively as I wanted, but in real life, it's not too bad.
Labels:
distress ink,
gesso,
grungepaper,
paint dabbers,
scd,
stickles,
Tim Holtz
Saturday, 16 October 2010
SCD WEEK 3 - ORANGE & BLACK
I am covered in black alcohol ink! This is why:
I finally completed my entry for the SCD challenge this week, orange and black.
I just had to do Halloween as I found some skeletons yesterday which were perfect for this wooden frame.
The frame was painted with orange dabber and then distressed with wild honey and rusty hinge inks. I over stamped in several places with Tim's cobweb, paint splodge and greeting stamps then with the Artistic Stamper's chicken wire stamp. The tree is cut from black mount board using Tim's new branch tree die which I covered with clear rock candy crackle paint. The flowers are cut from black card and black sequin waste using Tim's new tattered floral die. The leaves are Martha Stewart autumn branch punch and the roses in the flower centres are from a local wholesale store made black with alcohol ink - hence my now black fingers! -
So to begin, I covered the skull stamp with orange paint dabber and stamped into the centre of the mirror. Once dry, I masked it and went over the whole thing with black alcohol ink - more black on my fingers! - I then stuck some black lace all round the inside. I spread a thick layer of crackle paint to the place where the skeleton was to go, stuck the tree on plus the owl - some orange peel stickles gave him eyes - assembled the flowers and leaves then added some dried marigold distress stickles to various places such as the web. Finally, I glued some black and orange beads to the base of the tree in order to 'ground' it.
It looks better in real life and as I had no idea what I was doing all through the process, I think it's not bad.
Now, I'm not sure whether I can enter the Artistic Stamper Challenge twice, but if you use their stamps, you get entered twice anyway. No harm in trying eh?
I finally completed my entry for the SCD challenge this week, orange and black.
I just had to do Halloween as I found some skeletons yesterday which were perfect for this wooden frame.
The frame was painted with orange dabber and then distressed with wild honey and rusty hinge inks. I over stamped in several places with Tim's cobweb, paint splodge and greeting stamps then with the Artistic Stamper's chicken wire stamp. The tree is cut from black mount board using Tim's new branch tree die which I covered with clear rock candy crackle paint. The flowers are cut from black card and black sequin waste using Tim's new tattered floral die. The leaves are Martha Stewart autumn branch punch and the roses in the flower centres are from a local wholesale store made black with alcohol ink - hence my now black fingers! -
So to begin, I covered the skull stamp with orange paint dabber and stamped into the centre of the mirror. Once dry, I masked it and went over the whole thing with black alcohol ink - more black on my fingers! - I then stuck some black lace all round the inside. I spread a thick layer of crackle paint to the place where the skeleton was to go, stuck the tree on plus the owl - some orange peel stickles gave him eyes - assembled the flowers and leaves then added some dried marigold distress stickles to various places such as the web. Finally, I glued some black and orange beads to the base of the tree in order to 'ground' it.
It looks better in real life and as I had no idea what I was doing all through the process, I think it's not bad.
Now, I'm not sure whether I can enter the Artistic Stamper Challenge twice, but if you use their stamps, you get entered twice anyway. No harm in trying eh?
Sunday, 19 September 2010
YESTERDAY
No not the song, the day. I waited so long for yesterday to arrive and 'poof', in a flash, it went. However, not before I'd had a brilliant time.
I actually managed some sleep the night before and as 'peg leg' wanted to come to see the girls, we went in the motorhome so he could be comfortable for the day and watch a DVD or 2 and have a little sleep!! We arrived just after 9am and almost at the same time as Lindsay and David. Amy came out to welcome them and invited us in aswell. How sweet of her. Anyway, we had a brew and David and Lindsay got really busy with the set up of the workshop allowing me to help a little. That first hour flew and before we knew it, the others had arrived and we were ready for the off.
A great big welcome was given to Sioux (ArtyJen) who had driven up from Brixham, Devon. For those of you who don't know her, have a look at her blog and the SCD blog of whom she is a DT member. Some fabulous stuff there.
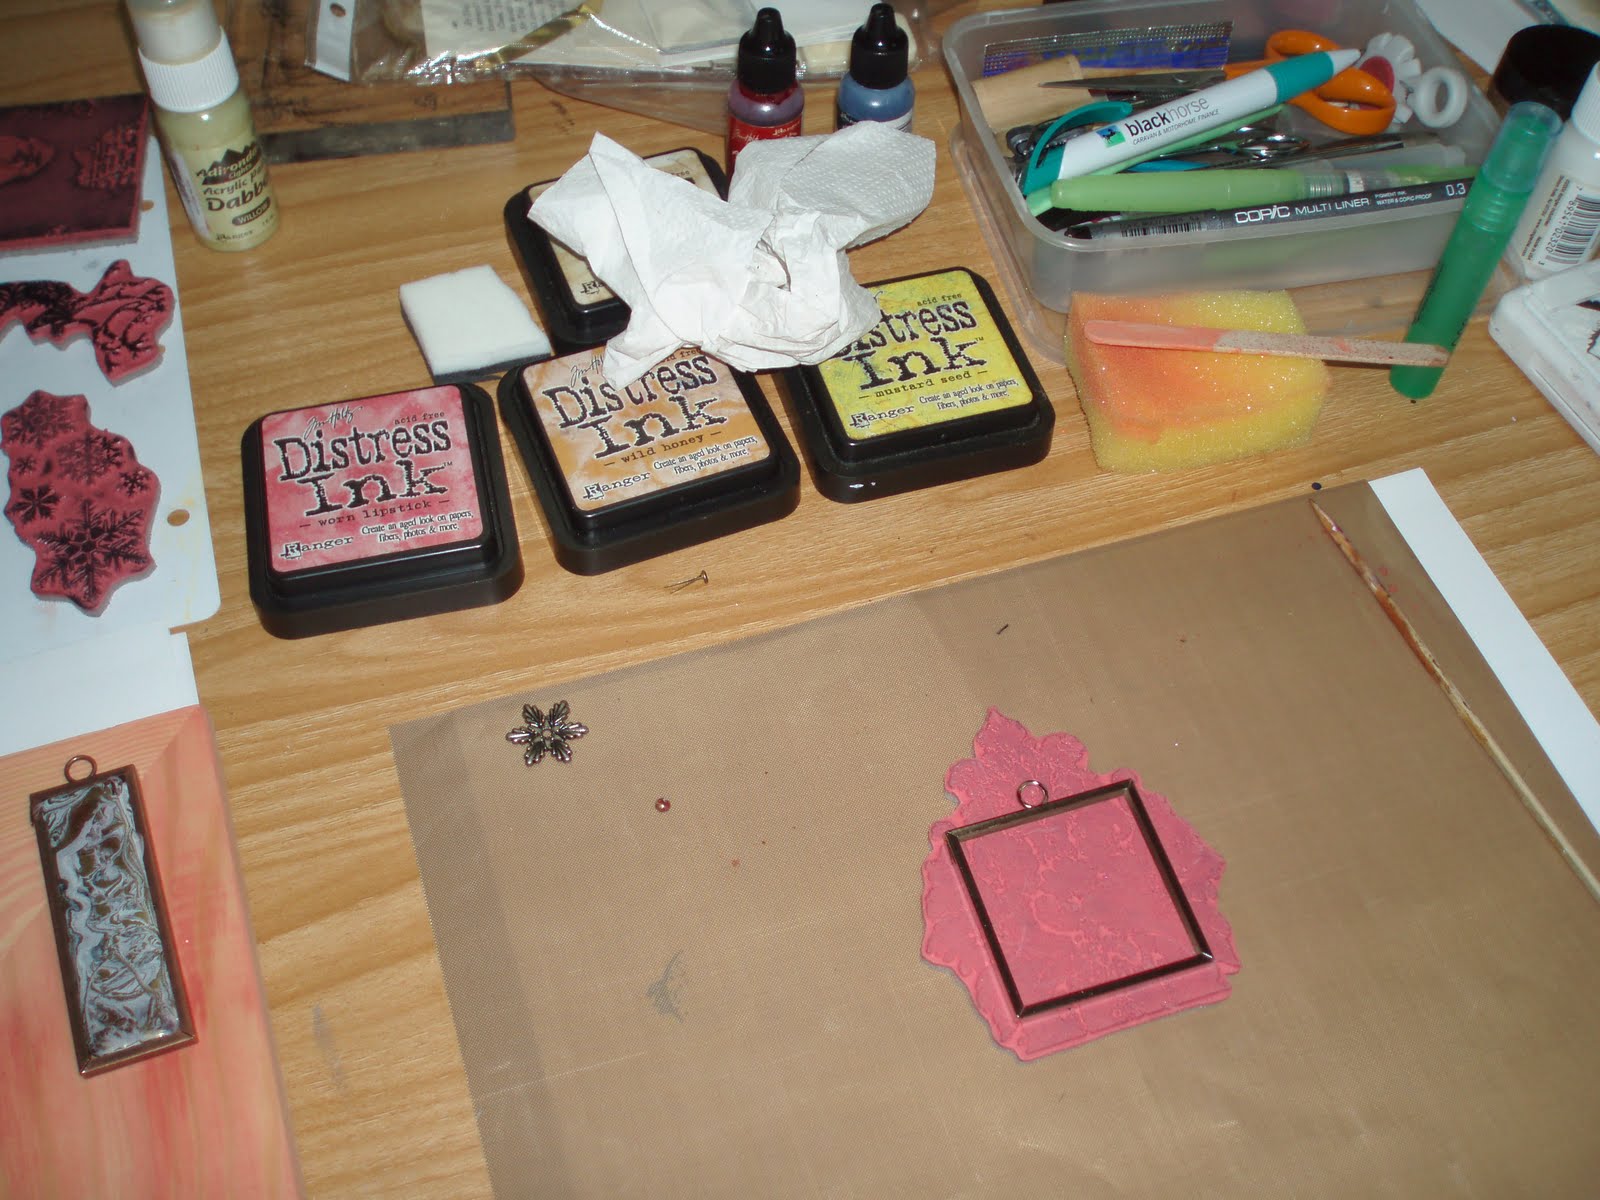
The 1st workshop was to alter a picture frame using melt pot techniques together with my favourite, Tim Holtz techniques. Where the time went was no bodies guess so none of us actually finished. Work in progress for me here. A few photos then of what I did manage to do.
Basically, we made little frames using UTEE and pictures, embellishments using moulds and cookie cutters, shapes by pouring UTEE onto the craft sheet, alcohol inked foil, alcohol inked tile with negative stamping - I like this one the best, sticky backed canvas transfer, gesso relief and more.
We seemed to keep our area tidy looking at the photos, but I know mine wasn't and I ended up with both inks and gesso all over the place. Good fun.
We finally stopped for lunch and some of us took off into the motorhome for ours as the shop had become really busy and there wasn't much room left. We also had been given our chunky grunge books by Heather, and just couldn 't wait to open them. You can see mine at the end of this post.
So back to the 2nd workshop - mystical shrines. This time we used patterned paper to cover a base card and a large matchbox. We used, paint dabbers - even some may have used mushroom dabbers eh Gez??!! A little joke between us. Also, alcohol inks, beads, wire, multi-medium, guilding sheets, but most of all, beeswax. This was new for me, not anymore though. I liked this a lot. I had been collecting 'little' treasures for weeks and even made some faux porcelain flowers and a beaded dragonfly I was lucky enough to use them too.
Sorry, didn't get the chance to turn this photo round. Again, it's not finished. I still need to add an embellishment to the top part of the drawer plus a few little tweeks here and there AND my faux porcelain flowers have just dropped off!!!
The second challenge was to make a smaller version this time with opening doors. Time ran out completely so we all just took the parts away with us to complete at home. However, I managed to take a photo of Lindsay's which is just gorgeous.
The session ended with lots of hugs and smiles and Lindsay did the honour of taking group photos with everyone's cameras. Get ready for the line up then.
Left to right: Me, Sioux, She, Gez and Heather.
Roll on the next time girls and a great big thank you for the lovely ATCs.
The first one is from She, cava queen is from Sioux, the torso is from Heather and the last one is from Gez.
Well, I know this is a marathon post but so was the day. I was so tired last night I fell asleep on the settee and didn't wake up 'til gone 1am. 'Peg leg' had gone to bed hours before!! Goodness knows how Lindsay felt being on her feet all day. But I got my book and here it is. Hope you enjoy it as much as I am.
For some reason Blogger won't upload my chunky book, so I'll try later on a separate post. Sozz..
I actually managed some sleep the night before and as 'peg leg' wanted to come to see the girls, we went in the motorhome so he could be comfortable for the day and watch a DVD or 2 and have a little sleep!! We arrived just after 9am and almost at the same time as Lindsay and David. Amy came out to welcome them and invited us in aswell. How sweet of her. Anyway, we had a brew and David and Lindsay got really busy with the set up of the workshop allowing me to help a little. That first hour flew and before we knew it, the others had arrived and we were ready for the off.
A great big welcome was given to Sioux (ArtyJen) who had driven up from Brixham, Devon. For those of you who don't know her, have a look at her blog and the SCD blog of whom she is a DT member. Some fabulous stuff there.
The 1st workshop was to alter a picture frame using melt pot techniques together with my favourite, Tim Holtz techniques. Where the time went was no bodies guess so none of us actually finished. Work in progress for me here. A few photos then of what I did manage to do.
We finally stopped for lunch and some of us took off into the motorhome for ours as the shop had become really busy and there wasn't much room left. We also had been given our chunky grunge books by Heather, and just couldn 't wait to open them. You can see mine at the end of this post.
So back to the 2nd workshop - mystical shrines. This time we used patterned paper to cover a base card and a large matchbox. We used, paint dabbers - even some may have used mushroom dabbers eh Gez??!! A little joke between us. Also, alcohol inks, beads, wire, multi-medium, guilding sheets, but most of all, beeswax. This was new for me, not anymore though. I liked this a lot. I had been collecting 'little' treasures for weeks and even made some faux porcelain flowers and a beaded dragonfly I was lucky enough to use them too.
Sorry, didn't get the chance to turn this photo round. Again, it's not finished. I still need to add an embellishment to the top part of the drawer plus a few little tweeks here and there AND my faux porcelain flowers have just dropped off!!!
The second challenge was to make a smaller version this time with opening doors. Time ran out completely so we all just took the parts away with us to complete at home. However, I managed to take a photo of Lindsay's which is just gorgeous.
The session ended with lots of hugs and smiles and Lindsay did the honour of taking group photos with everyone's cameras. Get ready for the line up then.
Left to right: Me, Sioux, She, Gez and Heather.
Roll on the next time girls and a great big thank you for the lovely ATCs.
Well, I know this is a marathon post but so was the day. I was so tired last night I fell asleep on the settee and didn't wake up 'til gone 1am. 'Peg leg' had gone to bed hours before!! Goodness knows how Lindsay felt being on her feet all day. But I got my book and here it is. Hope you enjoy it as much as I am.
For some reason Blogger won't upload my chunky book, so I'll try later on a separate post. Sozz..
Saturday, 11 September 2010
SCD - 1950s
Well, a little bit of mojo came back this week, in between more jobs outside, and I managed to complete a very special birthday card for my eldest step-daughter who we haven't seen for around 8years. A lovely moment when we bumped into her a couple of weeks ago. I'll leave it there suffice to say we all appear to be contented and happy.
Anyway, this weeks challenge over at Something Completely Different, is 1950s. Still using the monthly theme of ARCHES, I finally came up with this........
Unfortunately, I can actually remember some bits of the 50s. Having been born at the end of 1948, the 50s were my infant days and I lived with my parents and grandparents for the first 4 1/2yrs before moving to a new house for the next 7. The music of the day for me was probably more of the old 'uns like Bing Crosby, but I do remember Bill Haley and Rock Around the Clock. With that song in mind I made my arch!!!
The base is mount board cut to shape and distressed with pumice stone (another pun on rock there!!!) I then stamped the clock, outlined the edge in glossy accents and added a couple of spinners held with a long brad. Having cut a lot of flowers from grungepaper I was left with awkward bits, and not wanting to throw then away, I cut out 'rock' shapes and coloured them with - wait for it Gez - mushroom dabber. I stuck these around the clock with glossy accents and then added some flower soft to the cracks and a little ladybird. The words are created with a dymo, black on clear tape.
This technique was one I learnt on Lindsay Mason's fairy doors workshop. I had fun again.
Anyway, this weeks challenge over at Something Completely Different, is 1950s. Still using the monthly theme of ARCHES, I finally came up with this........
The base is mount board cut to shape and distressed with pumice stone (another pun on rock there!!!) I then stamped the clock, outlined the edge in glossy accents and added a couple of spinners held with a long brad. Having cut a lot of flowers from grungepaper I was left with awkward bits, and not wanting to throw then away, I cut out 'rock' shapes and coloured them with - wait for it Gez - mushroom dabber. I stuck these around the clock with glossy accents and then added some flower soft to the cracks and a little ladybird. The words are created with a dymo, black on clear tape.
This technique was one I learnt on Lindsay Mason's fairy doors workshop. I had fun again.
Monday, 5 April 2010
ANYTHING GOES
From today, Pollycraft have altered their challenges to run weekly. Hop over to their site and click on the link at the top of the page or type this in your search bar:
Today's challenge, #38 is - Anything Goes
Couldn't be easier could it? I made this memory box for a little girl I know and thought it may just be enough to enter. I started off with one of those brown papier mache boxes you can buy from hobby shops, mine came from Hobbycraft. Having tried Adirondak paint dabbers on it, I soon realised that the box was too big and I would need dozens of dabbers, so a trip to B&Q (several actually) saw me buying about 6 pots of tester paints! They worked a treat, and I have loads left.
I stamped the little girl image and coloured her with watercolour pencils. Then I added some patterned paper, gorgeous ribbon, Prima flowers, painted grunge letters and a little angel charm which is inscribed with 'made for an angel'.
The whole thing was a huge effort because it took me a week to make and cost a fortune in the end, but I think it was worth it. Hopefully it will hold many treasures and memories which, when looked at in years to come, make the owner happy.
Subscribe to:
Posts (Atom)