Somehow it seems longer than a month since Tim made the monthly tag. Got used to the 12 tags of Christmas I suppose. Anyway, how to compromise this time as I don't have the BOO die nor the ticket die nor the date stamps.
I came up with this:
I had everything to create the base tag so that was easy, I cut the spider from grungepaper but I already had the cat which was part of some pre-cut grunge from way back. The colouring of the glitter was quite messy and it took an age to dry so really it remained kind of lumpy!!!! Don't like that technique Tim, however, I do agree about the extra sparkle you get by colouring it with ink so maybe I'll have another go. I cut the October from the Lost & Found papers and stamped 'creepy' using some tiny Halloween stamps I have. The black wool tied at the top is also coloured with pitch black alcohol ink.
All in all, it turned out fine and I adore the colours. Thanks Tim for another fun tag time.
Showing posts with label alcohol inks. Show all posts
Friday, 12 October 2012
Saturday, 6 October 2012
WICKED WEDNESDAY ATC #52 - DARK FLOWERS
I have a very eerie skull image which is just perfect for this weeks challenge over at Wicked Wednesday, but can I find it --- NO. Instead, I've used the wonderful Fashion Witch image from Rick St Dennis.
My camera is having a day off today and doesn't want to take nice photos so I'm afraid the colours on this card are a bit 'wishy washy'. I used Copics to colour the witch and black soot alcohol ink on the roses.
Finally my big craft project is finished and a new shelf has been put up to accommodate it. I hope to start blogging photos tomorrow if you want to pop back.
My camera is having a day off today and doesn't want to take nice photos so I'm afraid the colours on this card are a bit 'wishy washy'. I used Copics to colour the witch and black soot alcohol ink on the roses.
Finally my big craft project is finished and a new shelf has been put up to accommodate it. I hope to start blogging photos tomorrow if you want to pop back.
Thursday, 2 August 2012
WW # 43 - TAKE TIME FOR YOU
Hi again, this time from Dorset, UK. I'm doing exactly what this week's theme at Wicked Wednesday ATC suggests, taking time for me.
I found this ATC in my stash and would you believe, I made it on 22nd March 2008!!!!
The background is alcohol inked with birds overstamped in Archival black and then covered with glossy accents. Not sure where the time piece came from but it's been cut out and then 3D foam added for depth. The words are taken from a Hero Arts Paris stamp. I remember threading a needle with the gold thread and 'sewing' the tow ropes onto the card.
Just off to spend more 'ME' time now.
I found this ATC in my stash and would you believe, I made it on 22nd March 2008!!!!
The background is alcohol inked with birds overstamped in Archival black and then covered with glossy accents. Not sure where the time piece came from but it's been cut out and then 3D foam added for depth. The words are taken from a Hero Arts Paris stamp. I remember threading a needle with the gold thread and 'sewing' the tow ropes onto the card.
Just off to spend more 'ME' time now.
Wednesday, 25 April 2012
WICKED WEDNESDAY ATC - #29 - YOU ARE MY SUNSHINE
We could certainly do with some sunshine in the UK today. Storms have caused havoc in the south and are now venturing north to me. At least the lovely cards that the Wicked Wednesday ATC DT have made bring a smile and warmth to your soul.
I decided to heat up my melt pot and make a face for my sun. Here it is:
I used alcohol inks for the base card giving the effect of a lovely blue sky. The rays are stamped in saffron Archival ink. I coloured the ruff with mustard seed distress stain and stuck everything down with multi matt medium including the defintion which I cut from an old dictionary.
Right then, next task........
I decided to heat up my melt pot and make a face for my sun. Here it is:
I used alcohol inks for the base card giving the effect of a lovely blue sky. The rays are stamped in saffron Archival ink. I coloured the ruff with mustard seed distress stain and stuck everything down with multi matt medium including the defintion which I cut from an old dictionary.
Right then, next task........
Saturday, 17 March 2012
WICKED WEDNESDAY ATC #23 - FLYING THINGS
I love this little challenge blog. I met most of my friends through making ATCs so they are special little cards. Wicked Wednesday ATC has some varied themes to have a play with and this week is no exception. I was going to use an air balloon stamp but decided that would be steampunk, and you know me and steampunk - I will crack it one day. So instead, I decided to search out ALL my butterfly stamps and use ones which would fit an ATC. This is what I ended up with:
Bit difficult to photograph in order to show the acetate ones,
A direct photo shows the silicone too much,
I tried to cover the 4 blobs of silicone I used to make the acetate stand out but failed on a couple of them. Still, you get the drift. I used black Archival to stamp a mix of butterflies and little beasties on the base card, coloured them with distress markers then distressed over the whole card. I then found some acetate packaging and cut a butterfly border with a Tim Holtz on the edge die. Cut in half this just fit along each 2.5" side. I used a mix of alcohol inks to colour this. I managed to hide 2 of the silicone blobs with little 3D peel off butterflies.
I think the first angled photo will be my entry this week. Another bit of fun.
Bit difficult to photograph in order to show the acetate ones,
A direct photo shows the silicone too much,
I tried to cover the 4 blobs of silicone I used to make the acetate stand out but failed on a couple of them. Still, you get the drift. I used black Archival to stamp a mix of butterflies and little beasties on the base card, coloured them with distress markers then distressed over the whole card. I then found some acetate packaging and cut a butterfly border with a Tim Holtz on the edge die. Cut in half this just fit along each 2.5" side. I used a mix of alcohol inks to colour this. I managed to hide 2 of the silicone blobs with little 3D peel off butterflies.
I think the first angled photo will be my entry this week. Another bit of fun.
Friday, 16 March 2012
ATCs/CARDS WITH ATTITUDE # 9
Pop over to our challenge blog HERE for all the details on this fortnight's challenge. After all, there is a prize of 4 digis up for grabs.
I just couldn't resist this image from our sponsors Delicious Doodles. She's called Pirate Polly. I printed her onto card suitable for my Copics which I used to colour her. After very carefully cutting her out, I used 3D foam to mount her on some pre-coloured card (I just swiped a distress ink pad over it) to which I had glued tiny shells, pearls and a brass lighthouse coloured with alcohol inks.
Wednesday, 7 March 2012
WICKED WEDNESDAY ATC # 22 - OVER THE RAINBOW
I'm on the ball this week with my entry for the Wicked Wednesday challenge - Over the Rainbow.
I made a sky and ground background with alcohol inks and stamped some little trees with black Archival. The bluebirds were squashed into an embossing pad and then covered with sparkly blue embossing powder. I coloured the rainbow with Copics and added a little Wizard of Oz image. Simple but it took a while and I had fun again.
Thursday, 15 December 2011
WICKED WEDNESDAY ATC CHALLENGE #10 - CHRISTMAS
Another week so another challenge over at Wicked Wednesday. This time the theme is Christmas or if you prefer not to do that you can choose Winter Holiday.
I have some new Xmas stamps, well they are new this year, and have already had a little play when making Xmas cards, so I decided to use some of the smaller ones to make my entry and chose, Christmas.
I used a mixture of different alcohol inks to make a setting sky, stamped the 'inn' twice and coloured it with distress inks before using 3D foam to stick it to the base once I had stamped the palm trees. I used some Brilliance, moonlight white to stamp the star. I then stamped the words with Archival and coloured the background with iced spruce DI.
Do you know what? I don't have any ink on my hands and no, I didn't wear gloves. I must be slipping!!
I have some new Xmas stamps, well they are new this year, and have already had a little play when making Xmas cards, so I decided to use some of the smaller ones to make my entry and chose, Christmas.
I used a mixture of different alcohol inks to make a setting sky, stamped the 'inn' twice and coloured it with distress inks before using 3D foam to stick it to the base once I had stamped the palm trees. I used some Brilliance, moonlight white to stamp the star. I then stamped the words with Archival and coloured the background with iced spruce DI.
Do you know what? I don't have any ink on my hands and no, I didn't wear gloves. I must be slipping!!
Friday, 4 November 2011
STAMPOTIQUE DESIGNERS CHALLENGE #41 - ALTERED POISON BOTTLE
I've had such fun with this. Halloween is far too short a time for crafting because your mind can work wonders with all the items involved. I decided to alter the large bottle given to me at the Tim Holtz workshop last February and it proved just the right size to able to use 'Pin Curl' and Jo Capper-Sandon's bee as his wings.
Eerie eh?
Anyway, this fortnights challenge over at the Stampotique Designers Challenge blog requires the use of Stampotique stamps only. I've done this but added some embellishments and some alcohol ink.
Hope this picture shows up ok. I love Pin Curl's tail. Here is a real spooky one.
I think I'll enter this last one. Have a go, you've got until the 8th.
Eerie eh?
Anyway, this fortnights challenge over at the Stampotique Designers Challenge blog requires the use of Stampotique stamps only. I've done this but added some embellishments and some alcohol ink.
Hope this picture shows up ok. I love Pin Curl's tail. Here is a real spooky one.
I think I'll enter this last one. Have a go, you've got until the 8th.
Monday, 11 July 2011
ANOTHER BIRTHDAY SUSANNA???????
How many have you had now??? What - 37!!!! Wow!
I suppose I'm going to get trouble for that but hopefully not for this:
This is a very special card, so I really hope Susi likes it. It's all the colours she now loves but more importantly, the inked background was given to me by Lindsay Mason following a demo on using the Stazon spray cleaner on alcohol ink to 'bleach' out a splattering of the ink. I think the effect is spectacular.
I used a Martha Stewart all around the page punch which - this time- worked perfectly. The flowers are coloured with paint dabbers and are the ones I was working on in the sunshine the other day.
It all came together really easily because it was made - WITH LOVE.
I suppose I'm going to get trouble for that but hopefully not for this:
This is a very special card, so I really hope Susi likes it. It's all the colours she now loves but more importantly, the inked background was given to me by Lindsay Mason following a demo on using the Stazon spray cleaner on alcohol ink to 'bleach' out a splattering of the ink. I think the effect is spectacular.
I used a Martha Stewart all around the page punch which - this time- worked perfectly. The flowers are coloured with paint dabbers and are the ones I was working on in the sunshine the other day.
It all came together really easily because it was made - WITH LOVE.
Thursday, 19 May 2011
ALCOHOL BACKGROUNDS
I posted on WOYWW yesterday, about the backgrounds I had been making following my wonderful workshop last Sunday with Amy and .Lindsay.
Lindsay showed us the most marvelous card - I had admired this card since she showed it on her blog as one of her samples - and boy, was I chuffed that we were to make it. I thought it would possibly make into an ATC, so I had a go and - 8 atcs later, this is what I ended up with.
A bit nice eh?
The other best bit about these ATCs is the fact that the little tree stamps and words were a Xmas present from Lindsay's sister Heather.
Just keeping it in the family girls.
Lindsay showed us the most marvelous card - I had admired this card since she showed it on her blog as one of her samples - and boy, was I chuffed that we were to make it. I thought it would possibly make into an ATC, so I had a go and - 8 atcs later, this is what I ended up with.
A bit nice eh?
The other best bit about these ATCs is the fact that the little tree stamps and words were a Xmas present from Lindsay's sister Heather.
Just keeping it in the family girls.
Friday, 15 April 2011
GIFT CARD ATC
My little pal and best friend, Susanna, sent me a gift card for Mother's Day. The colours were my favourite and the flowers on it, simply devine. The top part had a slit cut in it which showed the same flower underneath. I decided the top would make a lovely ATC. Here it is:
I stamped an Anna Griffin image on a 1"x3" glass slide and coloured it using alcohol inks. It fit perfectly behind the slit in the card. I had to build up the base to match the slide and then covered the edges with tissue tape, again coloured with ink.
I added a sample bottle of perfume and attached an old handbag charm.
I am really pleased with this as it used up items instead of throwing them away.
I stamped an Anna Griffin image on a 1"x3" glass slide and coloured it using alcohol inks. It fit perfectly behind the slit in the card. I had to build up the base to match the slide and then covered the edges with tissue tape, again coloured with ink.
I added a sample bottle of perfume and attached an old handbag charm.
I am really pleased with this as it used up items instead of throwing them away.
Friday, 1 April 2011
SWEET BIRDIE ALCOHOL INK TAG
by Ranger Ink.
I saw this gorgeous little project on Tuesday whilst zapping around the net and just had to have a go at it.
This is my version
I used a Hero Arts stamp, Tim's bird from his Caged Bird die, the dictionary page from Tim's workshop, a couple of stamps off packages from abroad, a key from an old clock found at a car boot sale plus other bits and bobs.

It's a really easy tag to make although a bit fiddly in parts, but I liked the use of alcohol inks for the background as opposed to distress inks. I think it's really cool.
The little bird could have looked better, but I kept to the menu of colours and he turned out quite colourful I think. No idea of his species though!
Great fun and quick, which gave me time to pull more of my hair out on these questions of Linday's. There is one that has really got me and no matter how I go about it (which includes bribery, searching the PI website, looking through dictionaries etc) I cannot think clearly for the answer. The worse bit is, I just know it will be staring me in the face!!!!!
I saw this gorgeous little project on Tuesday whilst zapping around the net and just had to have a go at it.
This is my version
I used a Hero Arts stamp, Tim's bird from his Caged Bird die, the dictionary page from Tim's workshop, a couple of stamps off packages from abroad, a key from an old clock found at a car boot sale plus other bits and bobs.
Great fun and quick, which gave me time to pull more of my hair out on these questions of Linday's. There is one that has really got me and no matter how I go about it (which includes bribery, searching the PI website, looking through dictionaries etc) I cannot think clearly for the answer. The worse bit is, I just know it will be staring me in the face!!!!!
Saturday, 27 November 2010
WAXED SANTA
I was looking through my 'scrap' drawer and found some alcohol inked backgrounds I made last year. The one I used here was quite dark as I used a little too much black, but it was perfect for this vintage print.
Because I used the second to last big card that Sonia gave me, and it has a wavy edge, I thought I should round the corners of the inked matt. Can I find my corner rounder anywhere? I've no idea where it is so I used a circle punch and got an inverted look instead.
The reindeers are Tim's from his reindeer flight die. I managed to cut some whole ones and some part ones from the music paper I had. The part one looks ok behind. However, I've just found a massive A3 sheet of music paper that I had completely forgotten about. That big clearout is now way overdue.
The ribbon matches too and is sticky backed. I reverted to my latest fave technique - wax - to stick the image to the matt. I left santa without a covering and added distress stickles to his clothes instead. A bit of rock candy stickles on the snow finished it off.
I'm just going to attempt another with the last of the big cards, that's if my bad back holds out! Must have twisted it in the night because I got up with it this morning. Oh well!
Because I used the second to last big card that Sonia gave me, and it has a wavy edge, I thought I should round the corners of the inked matt. Can I find my corner rounder anywhere? I've no idea where it is so I used a circle punch and got an inverted look instead.
The reindeers are Tim's from his reindeer flight die. I managed to cut some whole ones and some part ones from the music paper I had. The part one looks ok behind. However, I've just found a massive A3 sheet of music paper that I had completely forgotten about. That big clearout is now way overdue.
The ribbon matches too and is sticky backed. I reverted to my latest fave technique - wax - to stick the image to the matt. I left santa without a covering and added distress stickles to his clothes instead. A bit of rock candy stickles on the snow finished it off.
I'm just going to attempt another with the last of the big cards, that's if my bad back holds out! Must have twisted it in the night because I got up with it this morning. Oh well!
Thursday, 4 November 2010
A FEW MORE PHOTOS
The weather has been just awful this week and being away means having to use my web dongle. It's really good but a bit slow especially when the motorhome is nearly being blown over and the signal keeps failing. However, none of that spoiled Sonia and my day on Tuesday. We never actually 'made' anything but we had fun with alcohol inks and I did manage to die cut some grunge and card for her.
Not got a clue what we were doing here, looks like a right old struggle. Oh! I know. I was trying to show Sonia how to make flowers. We used the large tattered floral flower so that it wouldn't be too fiddly - but it was. Anyway, at least she managed to go away with a decent example from which to make some more.
This looks like 'peg leg' didn't want to get involved so took a photo from the front seat.
I think I am cutting up some glossy card ready to ink. Sonia is taking in the chatter about which type of card stock to use for alocohol inks and distress inks. She has been using pearlised card for her DIs and found that blending worked really well on it. I tried to explain about the different effects with different card and suggested she try the Personal Impressions 300gsm card that Lindsay uses.
Here are some of the little samples we made. I am lucky enough to have all the alcohol inks so we had a top choice. In fact, I haven't played with some of them so it was exciting for me too.
One of the best parts of the day was the fact that Sonia drove to Southport. She needed a boost to get back behind the wheel and I am glad she did. Her journey was straight forward so she was quite comfortable, and being a competent driver anyway, this little trip did the trick. Well done you.
'Til next time then.
Not got a clue what we were doing here, looks like a right old struggle. Oh! I know. I was trying to show Sonia how to make flowers. We used the large tattered floral flower so that it wouldn't be too fiddly - but it was. Anyway, at least she managed to go away with a decent example from which to make some more.
This looks like 'peg leg' didn't want to get involved so took a photo from the front seat.
I think I am cutting up some glossy card ready to ink. Sonia is taking in the chatter about which type of card stock to use for alocohol inks and distress inks. She has been using pearlised card for her DIs and found that blending worked really well on it. I tried to explain about the different effects with different card and suggested she try the Personal Impressions 300gsm card that Lindsay uses.
Here are some of the little samples we made. I am lucky enough to have all the alcohol inks so we had a top choice. In fact, I haven't played with some of them so it was exciting for me too.
One of the best parts of the day was the fact that Sonia drove to Southport. She needed a boost to get back behind the wheel and I am glad she did. Her journey was straight forward so she was quite comfortable, and being a competent driver anyway, this little trip did the trick. Well done you.
'Til next time then.
Tuesday, 26 October 2010
SUNDAY STAMPERS WEEK 126 - GREEN (onions)
Hop, skip and jump over to the Sunday Stampers - link in my sidebar - for details of this week's challenge.
Hels has set the colour GREEN for this one and you can make anything you like. Here's mine:
It's a very simple ATC but I've used my newly acquired (today actually) Martha Stewart punches on the corner and edge.
The base card is special glossy stock which takes alcohol inks. I used about 6/7 different inks and blew them across the card with an air can. The little bird is from Tim's Caged Bird die, simply distressed and highlighted with stickles before being stuck to the base with 3D foam.
I rubbed the tissue tape with distress ink and tore it up before adding that. The beads are stuck down with stickles.
I've never seen a bird like this one, have you??
Hels has set the colour GREEN for this one and you can make anything you like. Here's mine:
It's a very simple ATC but I've used my newly acquired (today actually) Martha Stewart punches on the corner and edge.
The base card is special glossy stock which takes alcohol inks. I used about 6/7 different inks and blew them across the card with an air can. The little bird is from Tim's Caged Bird die, simply distressed and highlighted with stickles before being stuck to the base with 3D foam.
I rubbed the tissue tape with distress ink and tore it up before adding that. The beads are stuck down with stickles.
I've never seen a bird like this one, have you??
Monday, 25 October 2010
BEAUTIFUL ART
A lovely surprise for me yesterday, was to be given an ATC from Gez. Although she couldn't make it to the demo, she had sent this fabulous card for me.
I am such a fan of Stampotique stamps too.
Many thanks Gez. I owe you.
Not only did I receive this ATC, but She had also made 2 amazing tags for me. How lucky am I?
This tag is even more amazing in real life. The detail and embossing make it feel like wax. I love the rich colours too.
This is a special tag for me because I just love orange and black coupled with Tim's fabulous Halloween stamps.
Again, the detail and combination is so good, right down to the black embossing around the edges. Fab.
Thanks again She. x
I managed to swap a couple of ATCs but can only find one. I think the other must still be in the car. I'll have to have a search. Anyway, this one is from Lindsay.
These colours are my all time favourite so I just had to pick this one.
I think I am right in saying that the background is alcohol ink on metal over stamped with one of Tim's stamps in black archival. Lindsay has written the words in white gel pen and stuck the word 'discover' on top of that.
It also looks like she has coloured some ribbon to match the card. Fabulous.
Thank you again ladies.
I am such a fan of Stampotique stamps too.
Many thanks Gez. I owe you.
Not only did I receive this ATC, but She had also made 2 amazing tags for me. How lucky am I?
This tag is even more amazing in real life. The detail and embossing make it feel like wax. I love the rich colours too.
This is a special tag for me because I just love orange and black coupled with Tim's fabulous Halloween stamps.
Again, the detail and combination is so good, right down to the black embossing around the edges. Fab.
Thanks again She. x
I managed to swap a couple of ATCs but can only find one. I think the other must still be in the car. I'll have to have a search. Anyway, this one is from Lindsay.
These colours are my all time favourite so I just had to pick this one.
I think I am right in saying that the background is alcohol ink on metal over stamped with one of Tim's stamps in black archival. Lindsay has written the words in white gel pen and stuck the word 'discover' on top of that.
It also looks like she has coloured some ribbon to match the card. Fabulous.
Thank you again ladies.
Saturday, 16 October 2010
SCD WEEK 3 - ORANGE & BLACK
I am covered in black alcohol ink! This is why:
I finally completed my entry for the SCD challenge this week, orange and black.
I just had to do Halloween as I found some skeletons yesterday which were perfect for this wooden frame.
The frame was painted with orange dabber and then distressed with wild honey and rusty hinge inks. I over stamped in several places with Tim's cobweb, paint splodge and greeting stamps then with the Artistic Stamper's chicken wire stamp. The tree is cut from black mount board using Tim's new branch tree die which I covered with clear rock candy crackle paint. The flowers are cut from black card and black sequin waste using Tim's new tattered floral die. The leaves are Martha Stewart autumn branch punch and the roses in the flower centres are from a local wholesale store made black with alcohol ink - hence my now black fingers! -
So to begin, I covered the skull stamp with orange paint dabber and stamped into the centre of the mirror. Once dry, I masked it and went over the whole thing with black alcohol ink - more black on my fingers! - I then stuck some black lace all round the inside. I spread a thick layer of crackle paint to the place where the skeleton was to go, stuck the tree on plus the owl - some orange peel stickles gave him eyes - assembled the flowers and leaves then added some dried marigold distress stickles to various places such as the web. Finally, I glued some black and orange beads to the base of the tree in order to 'ground' it.
It looks better in real life and as I had no idea what I was doing all through the process, I think it's not bad.
Now, I'm not sure whether I can enter the Artistic Stamper Challenge twice, but if you use their stamps, you get entered twice anyway. No harm in trying eh?
I finally completed my entry for the SCD challenge this week, orange and black.
I just had to do Halloween as I found some skeletons yesterday which were perfect for this wooden frame.
The frame was painted with orange dabber and then distressed with wild honey and rusty hinge inks. I over stamped in several places with Tim's cobweb, paint splodge and greeting stamps then with the Artistic Stamper's chicken wire stamp. The tree is cut from black mount board using Tim's new branch tree die which I covered with clear rock candy crackle paint. The flowers are cut from black card and black sequin waste using Tim's new tattered floral die. The leaves are Martha Stewart autumn branch punch and the roses in the flower centres are from a local wholesale store made black with alcohol ink - hence my now black fingers! -
So to begin, I covered the skull stamp with orange paint dabber and stamped into the centre of the mirror. Once dry, I masked it and went over the whole thing with black alcohol ink - more black on my fingers! - I then stuck some black lace all round the inside. I spread a thick layer of crackle paint to the place where the skeleton was to go, stuck the tree on plus the owl - some orange peel stickles gave him eyes - assembled the flowers and leaves then added some dried marigold distress stickles to various places such as the web. Finally, I glued some black and orange beads to the base of the tree in order to 'ground' it.
It looks better in real life and as I had no idea what I was doing all through the process, I think it's not bad.
Now, I'm not sure whether I can enter the Artistic Stamper Challenge twice, but if you use their stamps, you get entered twice anyway. No harm in trying eh?
Sunday, 19 September 2010
YESTERDAY
No not the song, the day. I waited so long for yesterday to arrive and 'poof', in a flash, it went. However, not before I'd had a brilliant time.
I actually managed some sleep the night before and as 'peg leg' wanted to come to see the girls, we went in the motorhome so he could be comfortable for the day and watch a DVD or 2 and have a little sleep!! We arrived just after 9am and almost at the same time as Lindsay and David. Amy came out to welcome them and invited us in aswell. How sweet of her. Anyway, we had a brew and David and Lindsay got really busy with the set up of the workshop allowing me to help a little. That first hour flew and before we knew it, the others had arrived and we were ready for the off.
A great big welcome was given to Sioux (ArtyJen) who had driven up from Brixham, Devon. For those of you who don't know her, have a look at her blog and the SCD blog of whom she is a DT member. Some fabulous stuff there.
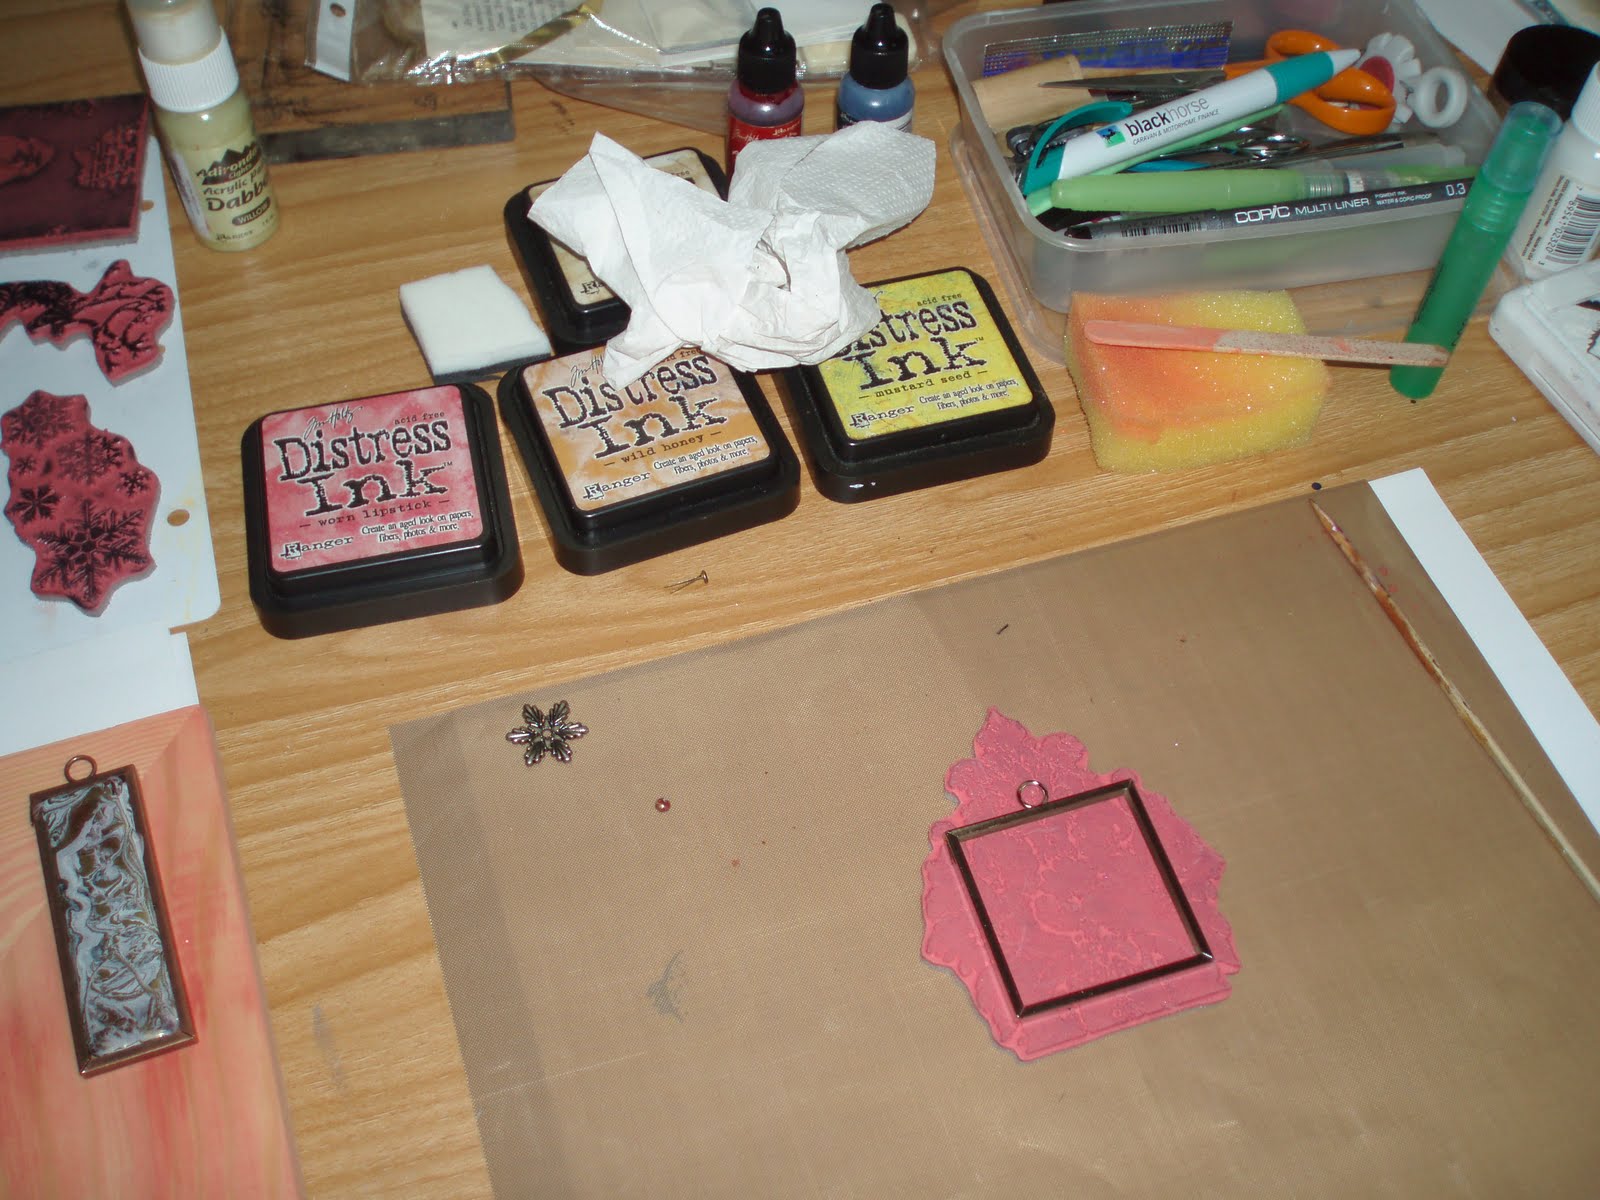
The 1st workshop was to alter a picture frame using melt pot techniques together with my favourite, Tim Holtz techniques. Where the time went was no bodies guess so none of us actually finished. Work in progress for me here. A few photos then of what I did manage to do.
Basically, we made little frames using UTEE and pictures, embellishments using moulds and cookie cutters, shapes by pouring UTEE onto the craft sheet, alcohol inked foil, alcohol inked tile with negative stamping - I like this one the best, sticky backed canvas transfer, gesso relief and more.
We seemed to keep our area tidy looking at the photos, but I know mine wasn't and I ended up with both inks and gesso all over the place. Good fun.
We finally stopped for lunch and some of us took off into the motorhome for ours as the shop had become really busy and there wasn't much room left. We also had been given our chunky grunge books by Heather, and just couldn 't wait to open them. You can see mine at the end of this post.
So back to the 2nd workshop - mystical shrines. This time we used patterned paper to cover a base card and a large matchbox. We used, paint dabbers - even some may have used mushroom dabbers eh Gez??!! A little joke between us. Also, alcohol inks, beads, wire, multi-medium, guilding sheets, but most of all, beeswax. This was new for me, not anymore though. I liked this a lot. I had been collecting 'little' treasures for weeks and even made some faux porcelain flowers and a beaded dragonfly I was lucky enough to use them too.
Sorry, didn't get the chance to turn this photo round. Again, it's not finished. I still need to add an embellishment to the top part of the drawer plus a few little tweeks here and there AND my faux porcelain flowers have just dropped off!!!
The second challenge was to make a smaller version this time with opening doors. Time ran out completely so we all just took the parts away with us to complete at home. However, I managed to take a photo of Lindsay's which is just gorgeous.
The session ended with lots of hugs and smiles and Lindsay did the honour of taking group photos with everyone's cameras. Get ready for the line up then.
Left to right: Me, Sioux, She, Gez and Heather.
Roll on the next time girls and a great big thank you for the lovely ATCs.
The first one is from She, cava queen is from Sioux, the torso is from Heather and the last one is from Gez.
Well, I know this is a marathon post but so was the day. I was so tired last night I fell asleep on the settee and didn't wake up 'til gone 1am. 'Peg leg' had gone to bed hours before!! Goodness knows how Lindsay felt being on her feet all day. But I got my book and here it is. Hope you enjoy it as much as I am.
For some reason Blogger won't upload my chunky book, so I'll try later on a separate post. Sozz..
I actually managed some sleep the night before and as 'peg leg' wanted to come to see the girls, we went in the motorhome so he could be comfortable for the day and watch a DVD or 2 and have a little sleep!! We arrived just after 9am and almost at the same time as Lindsay and David. Amy came out to welcome them and invited us in aswell. How sweet of her. Anyway, we had a brew and David and Lindsay got really busy with the set up of the workshop allowing me to help a little. That first hour flew and before we knew it, the others had arrived and we were ready for the off.
A great big welcome was given to Sioux (ArtyJen) who had driven up from Brixham, Devon. For those of you who don't know her, have a look at her blog and the SCD blog of whom she is a DT member. Some fabulous stuff there.
The 1st workshop was to alter a picture frame using melt pot techniques together with my favourite, Tim Holtz techniques. Where the time went was no bodies guess so none of us actually finished. Work in progress for me here. A few photos then of what I did manage to do.
We finally stopped for lunch and some of us took off into the motorhome for ours as the shop had become really busy and there wasn't much room left. We also had been given our chunky grunge books by Heather, and just couldn 't wait to open them. You can see mine at the end of this post.
So back to the 2nd workshop - mystical shrines. This time we used patterned paper to cover a base card and a large matchbox. We used, paint dabbers - even some may have used mushroom dabbers eh Gez??!! A little joke between us. Also, alcohol inks, beads, wire, multi-medium, guilding sheets, but most of all, beeswax. This was new for me, not anymore though. I liked this a lot. I had been collecting 'little' treasures for weeks and even made some faux porcelain flowers and a beaded dragonfly I was lucky enough to use them too.
Sorry, didn't get the chance to turn this photo round. Again, it's not finished. I still need to add an embellishment to the top part of the drawer plus a few little tweeks here and there AND my faux porcelain flowers have just dropped off!!!
The second challenge was to make a smaller version this time with opening doors. Time ran out completely so we all just took the parts away with us to complete at home. However, I managed to take a photo of Lindsay's which is just gorgeous.
The session ended with lots of hugs and smiles and Lindsay did the honour of taking group photos with everyone's cameras. Get ready for the line up then.
Left to right: Me, Sioux, She, Gez and Heather.
Roll on the next time girls and a great big thank you for the lovely ATCs.
Well, I know this is a marathon post but so was the day. I was so tired last night I fell asleep on the settee and didn't wake up 'til gone 1am. 'Peg leg' had gone to bed hours before!! Goodness knows how Lindsay felt being on her feet all day. But I got my book and here it is. Hope you enjoy it as much as I am.
For some reason Blogger won't upload my chunky book, so I'll try later on a separate post. Sozz..
Saturday, 28 August 2010
SCD - OF THE SEA
I have had a good time this month joining in with the SCD challenges.
All have had the basic theme - Torso - with a twist to it each week. This weeks is the last and is 'of the sea'.
I thought this may be easy until I started. Not one single stamp with anything like a sea theme in my drawers.
However, not to be beaten, I came up with this.
Again, my camera is not responding to close ups, sorry.
The wording at the top is covered in glossy accents ans a few beadazzles so is not easily made out but is a torn piece of dictionary definition re. ocean, a large section of sea.
The 'sea angel mermaid' is stamped with teal Stazon onto card and then cut out. (and you thought she was just a fairy didn't you?) The whole of the base mountboard is coloured with various alcohol inks which I tapped on. I then went to town with sticking my gorgeous Brixham mini shells, moss, seed beads, beadazzles and stickles to the base. The little 'mermaid' is sitting amongst them trying to have a rest!!
I had my jiffy bag ready to send off my swaps after having completed this one, but will have to look for a box now 'cos this won't fit. Thank you SCD for this months fun. I wonder what September will bring.
All have had the basic theme - Torso - with a twist to it each week. This weeks is the last and is 'of the sea'.
I thought this may be easy until I started. Not one single stamp with anything like a sea theme in my drawers.
However, not to be beaten, I came up with this.
Again, my camera is not responding to close ups, sorry.
The wording at the top is covered in glossy accents ans a few beadazzles so is not easily made out but is a torn piece of dictionary definition re. ocean, a large section of sea.
The 'sea angel mermaid' is stamped with teal Stazon onto card and then cut out. (and you thought she was just a fairy didn't you?) The whole of the base mountboard is coloured with various alcohol inks which I tapped on. I then went to town with sticking my gorgeous Brixham mini shells, moss, seed beads, beadazzles and stickles to the base. The little 'mermaid' is sitting amongst them trying to have a rest!!
I had my jiffy bag ready to send off my swaps after having completed this one, but will have to look for a box now 'cos this won't fit. Thank you SCD for this months fun. I wonder what September will bring.
Subscribe to:
Posts (Atom)